
August 27, 2026 · RV Fun Center
Water Damage in an RV: The Early Signs Most Owners Miss
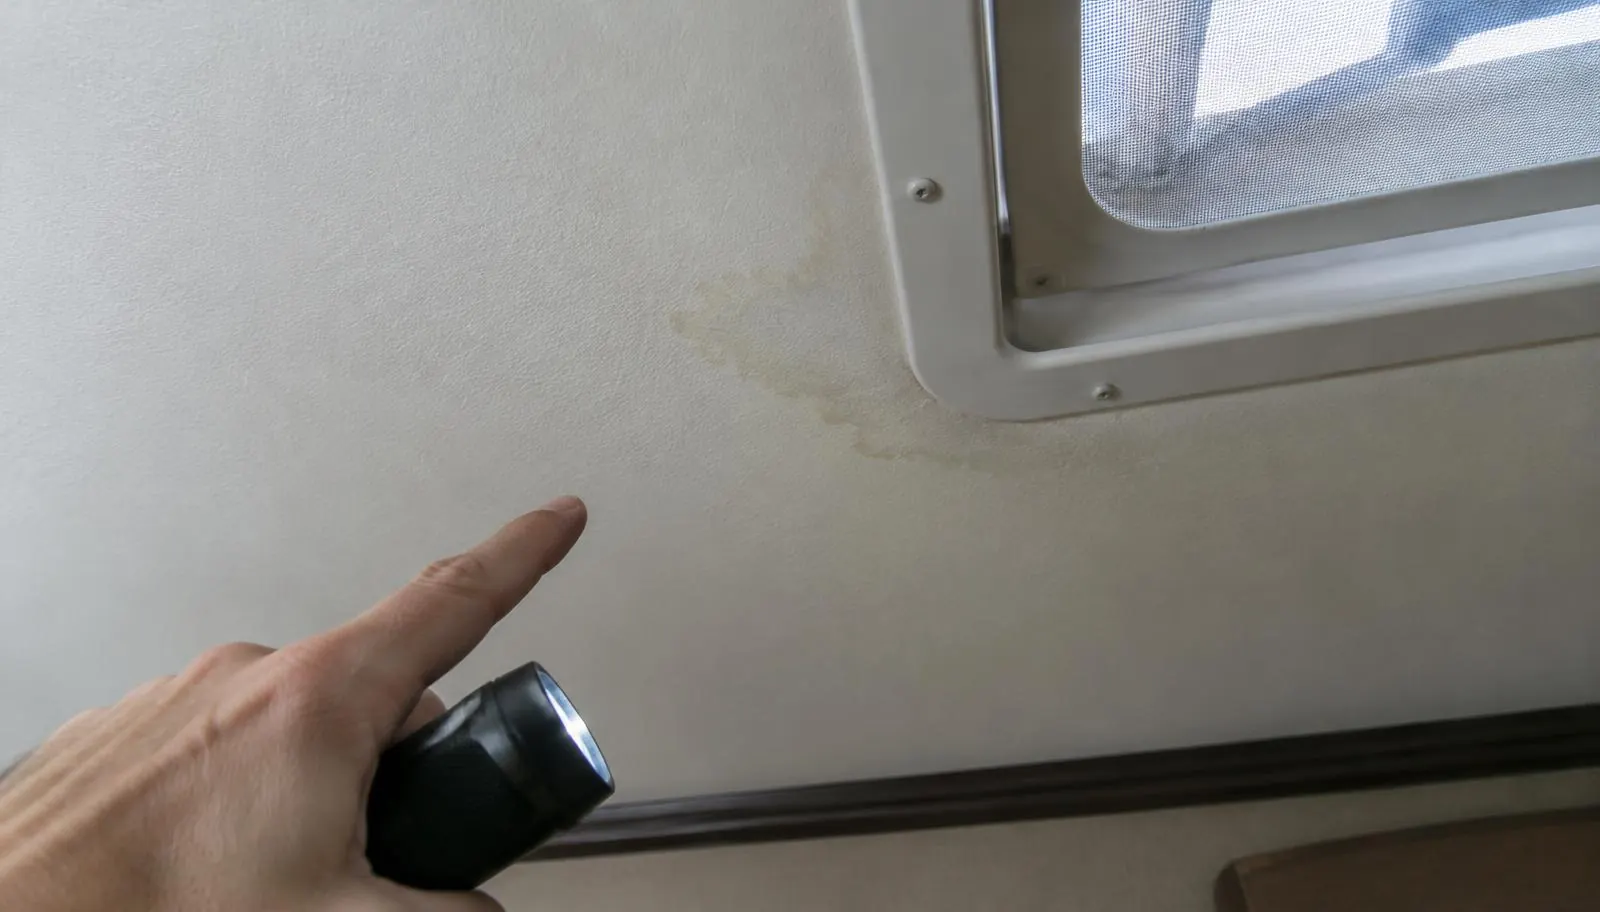
Water damage is one of the most expensive problems an RV can have, and one of the easiest to miss. RVs are built with layers, and water that gets past the outside skin can travel along framing and under flooring for a long time before anything shows inside. In Southern California, where it may not rain for months, a leak can sit quietly until the first storm of the season, then suddenly show up as a stain.
The goal of this guide is to help you notice the early signs, before a small leak turns into a soft floor or a delaminated wall.
Why early signs are easy to miss
Most RV leaks are slow. A drip from a cracked seal might only happen during heavy rain or when the RV is parked at a slight angle. The water soaks into wood or insulation first, which hides it. By the time you can see or feel something, it has often been going on for a while.
Coastal humidity can also make it harder to tell normal condensation from a leak. That is why it helps to look in the same places on a regular schedule.
Your nose is a good first tool
A musty, earthy smell when you first open the RV is often the earliest sign of trapped moisture. Pay attention to where the smell is strongest. Open cabinets, closets, and storage areas, especially along the outer walls and under the bed. A smell that lingers after airing out the coach is worth investigating.
Where to look, and what to look for
Use a flashlight held at a low angle to the surface. Raking light makes ripples and stains easier to see.
- Ceilings around roof vents, skylights, the A/C unit, and light fixtures. Look for faint rings, yellowing, or small bubbles in the ceiling material.
- Corners where the walls meet the ceiling, especially at the front and rear caps.
- Around every window. Check the wall below each corner for discoloration, and the inside sill for dampness.
- Inside cabinets on outside walls. The back panels often show stains before the main wall does.
- Around the entry door frame and any exterior compartment doors.
- Along the floor near slide-outs, and the slide floor itself.
- Under sinks and around the toilet and shower, where plumbing leaks are common.
Press, do not just look
Some damage can be felt before it can be seen. Walk the floor slowly in socks and notice any spot that feels softer, bouncier, or lower than the area around it. Common places are near the entry door, in front of the sink and shower, and near slides.
On the walls inside, press gently with an open hand. A healthy wall feels firm. A wall that gives slightly or feels spongy may have wet framing behind it.
Look at the outside walls in good light
Stand at each end of the RV and sight down the sidewall, ideally in the morning or late afternoon when the light is low. A healthy fiberglass sidewall looks smooth. Bubbles, waves, or areas that look slightly puffed out can mean the outer skin is separating from the wall behind it, which is often caused by water getting in. Look especially below windows, around marker lights, and near the corners.
Simple checks after rain
The first rain after a long dry spell is a perfect test. After it rains, or after you wash the RV, take a few minutes to walk through the inside and check the places listed above. Touch the walls and ceiling near windows and vents. Look in the back of cabinets. Write down anything new. If you are not sure, take a photo and check again in a week to see if it changed.
What to do if you find something
- Do not cover it up with new sealant or paint until you know where the water is coming from.
- Dry the area and keep the RV ventilated.
- Take photos so you can track any changes.
- Avoid heavy weight on soft floor areas.
- Have it inspected so the source and the extent of the damage can be found.
When to bring it in
If you notice any of these signs, sooner is better. A leak caught early may only need a seal repaired and a small area dried. A leak left for a season can mean replacing subfloor, framing, or wall panels. Our Oceanside shop finds where the water is coming from, repairs the source, and rebuilds damaged areas so they are solid again.
Need a hand?
Call (855) 802-2343 or request a quote.
Learn about RV Water Damage and Structural Restoration